
Claude Code plan mode: how to use it and when to skip it
Claude Code plan mode, step by step: how to turn it on, why Claude enters it by itself, approving or editing the plan, opusplan, and when to skip it.
Claude Code plan mode, sometimes called planning mode, makes Claude research a change and write a plan before it edits anything. Press Shift+Tab until the status bar under the prompt reads ⏸ plan mode on, ask for the change, and Claude comes back with a plan and three choices.
The facts below come from Anthropic's permission modes and model configuration docs, read on 12 and 18 November 2026, and from a real session on Claude Code v2.1.322. I checked the newer sections against v2.1.327 on 18 November. I build Starkomand, a Mac app for running coding agents on one canvas, and the last section covers what a waiting plan looks like when several agents run at once.
How do I turn on plan mode in Claude Code?
There are three ways.
- During a session: press Shift+Tab until the status bar reads
⏸ plan mode on. - For one prompt: start the prompt with
/plan. - At startup: run
claude --permission-mode plan.

A real Claude Code session on a demo project, after three presses of Shift+Tab.
From v2.1.283, terminal sessions start in auto mode. From there the cycle runs manual, accept edits, then plan, so it is three presses. Press Shift+Tab again to leave plan mode without approving anything.
To start every session of a project in plan mode, add this to .claude/settings.json:
{
  "permissions": {
    "defaultMode": "plan"
  }
}
The VS Code extension does not read project settings for its starting mode. There, set claudeCode.initialPermissionMode to plan in your user settings.
Can Claude switch to plan mode by itself?
Yes. Claude Code gives Claude a tool called EnterPlanMode, and the tool's instructions tell Claude to use it before writing code for any task that is not simple. In auto mode, the default, Claude switches without asking. In the other modes you may get a prompt first, Enter plan mode?, with Yes, enter plan mode and No, start implementing now.
The approval screen is the other half. Claude calls ExitPlanMode to show you the plan, and nothing is edited until you pick an option.
If Claude starts planning a change you wanted done at once, press Shift+Tab to leave plan mode, or answer No, start implementing now when it asks. The docs list no setting that turns this off.
What can Claude do in plan mode?
Claude reads files, runs shell commands to explore, and writes the plan. It does not edit your source until you approve.
Shell commands are handled in one of two ways:
- Auto mode available, which is the default: a classifier reviews each command. Approved ones run and rejected ones are blocked.
- Auto mode not available: anything outside the built-in read-only commands asks you first.
There is one exception worth knowing. In a terminal session where bypass permissions is available, Claude Code does not enforce plan mode's blocks. Claude is still told to plan without editing, but an edit it attempts would run without a prompt. If you rely on plan mode as a safety boundary, do not start that session with bypass permissions.
In my session Claude did two things before it wrote a line of the plan. It sent a subagent to read the checkout code, and then it asked me two questions: whether free shipping should be judged before or after the discount, and where the codes should be stored. Both answers ended up in the plan under "Decisions".
How do I approve or change the plan?
When the plan is ready, Claude shows it and asks how to proceed.
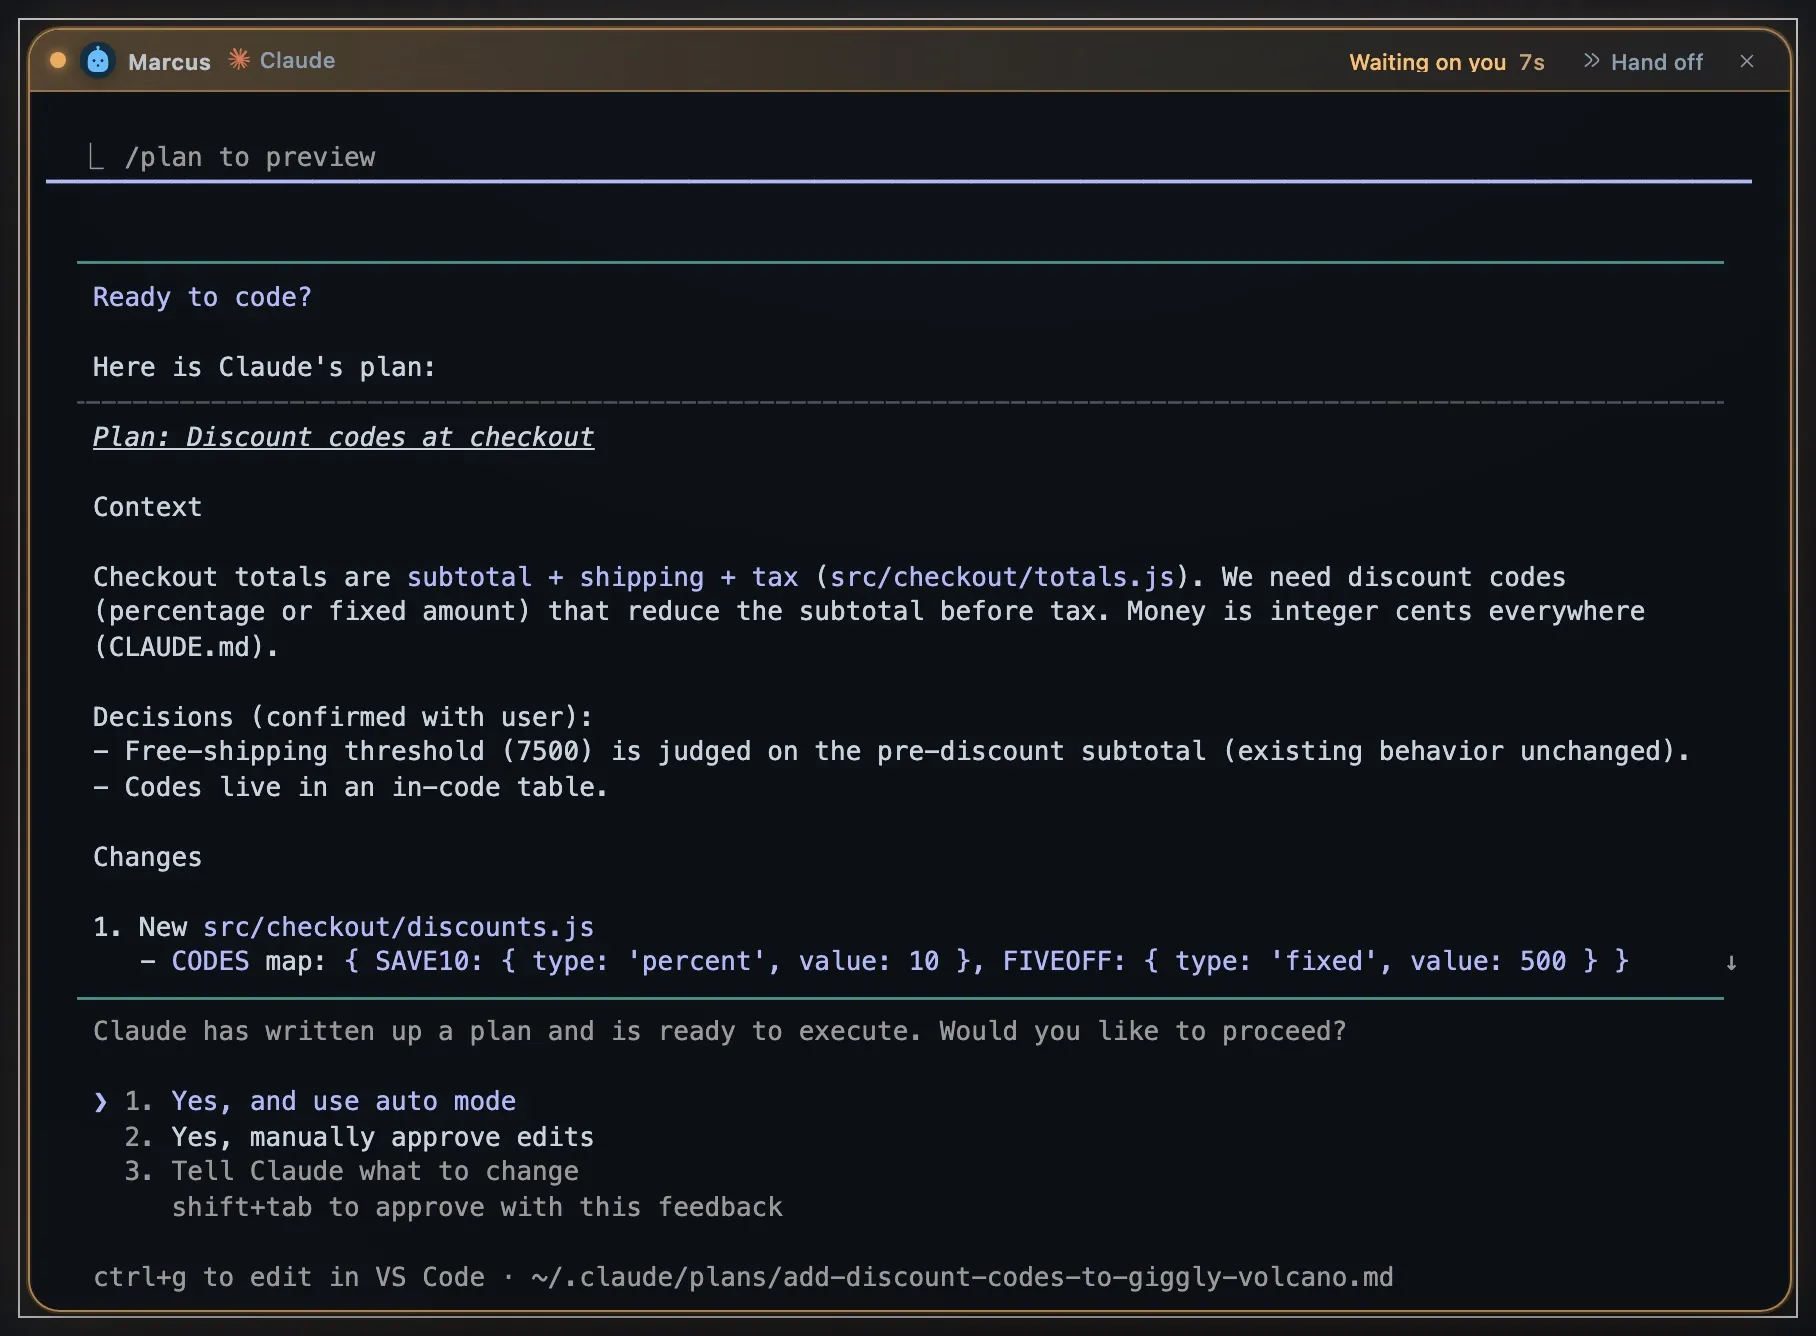
The real approval prompt on v2.1.322. The demo project is a small checkout module I wrote for these screenshots.
On v2.1.322 the three options read:
- Yes, and use auto mode. Claude starts editing, and the session switches to auto mode. If auto mode is not available to you, this option reads Yes, auto-accept edits.
- Yes, manually approve edits. Claude starts, and asks before each edit.
- Tell Claude what to change. You stay in plan mode and type what is wrong. The docs call this one "No, keep planning".
Two more keys work on this screen. Ctrl+G opens the plan in your text editor, so you can rewrite a step yourself before Claude proceeds. The screen also notes that Shift+Tab approves the plan together with the feedback you typed under option 3.
Approving does three things at once: it leaves plan mode, it switches the permission mode to the one the option names, and it gives the session a title based on the plan, unless you already named it. Mine became add-checkout-discount-codes.
Set showClearContextOnPlanAccept in your settings and the list gains a first option that approves the plan and clears the planning context.
Where is the plan saved?
The plan is a Markdown file in ~/.claude/plans/. The approval screen prints its path on the last line. Set plansDirectory in your settings to keep plans somewhere else, such as inside the repository.
To plan again later in the same session, cycle back with Shift+Tab or start your next prompt with /plan.
How do I get a plan without Claude starting to code?
Pick neither Yes option. Choose Tell Claude what to change, or press Esc to close the prompt. Either way the session stays in plan mode and nothing is edited. The plan is already a file, so you can keep it, paste it into a ticket or give it to another agent.
Careful with Shift+Tab on this screen: there it approves the plan. Press Esc first, then Shift+Tab to leave plan mode.
Which model writes the plan?
The session's model, unless you choose opusplan. That alias uses Opus while you are in plan mode and switches to Sonnet once you approve, so Opus only does the planning. On the Anthropic API that is Opus 5.5 for the plan and Sonnet 5.5 for the build.
Choose it with /model opusplan during a session, or start with claude --model opusplan.
What happened to /ultraplan?
Anthropic removed it. Ultraplan was a research preview that wrote the plan in a cloud session, where you could edit it and comment on it in the browser. The Ultraplan docs page now says the /ultraplan command, the ultraplan keyword and the No, refine with Ultraplan on Claude Code on the web option are all gone.
What is left is plan mode in your own session, as above, or cloud sessions if you want Claude Code to run in the cloud.
When should I skip plan mode?
Plan mode costs a round trip. Claude explores, you read, you approve, and only then does work start. This is the rule I use, and it is an opinion.
Plan first when:
- The change touches several files, or code you have not read.
- There is a product decision inside the task. My discount example had two, and Claude found both.
- A wrong start is expensive to undo, such as a migration or a change to a public interface.
Skip it when:
- You could describe the diff in one sentence.
- The change is easy to check and easy to revert, such as a rename, a copy fix or a failing test with an obvious cause.
- You already have a plan. Paste it in and let Claude build.
If you skip the plan and the result surprises you, that is the signal to go back. Press Esc, switch to plan mode and ask again.
What does a waiting plan look like with several agents?
A plan that is ready for approval is a full stop. Claude does nothing until you answer. With one terminal you see it at once. With three or four agents, a plan can sit unapproved for twenty minutes while you watch a different window.
In Starkomand each agent is a window on one canvas. When Claude asks you to approve a plan, that window turns amber and its header reads Waiting on you, with a timer.
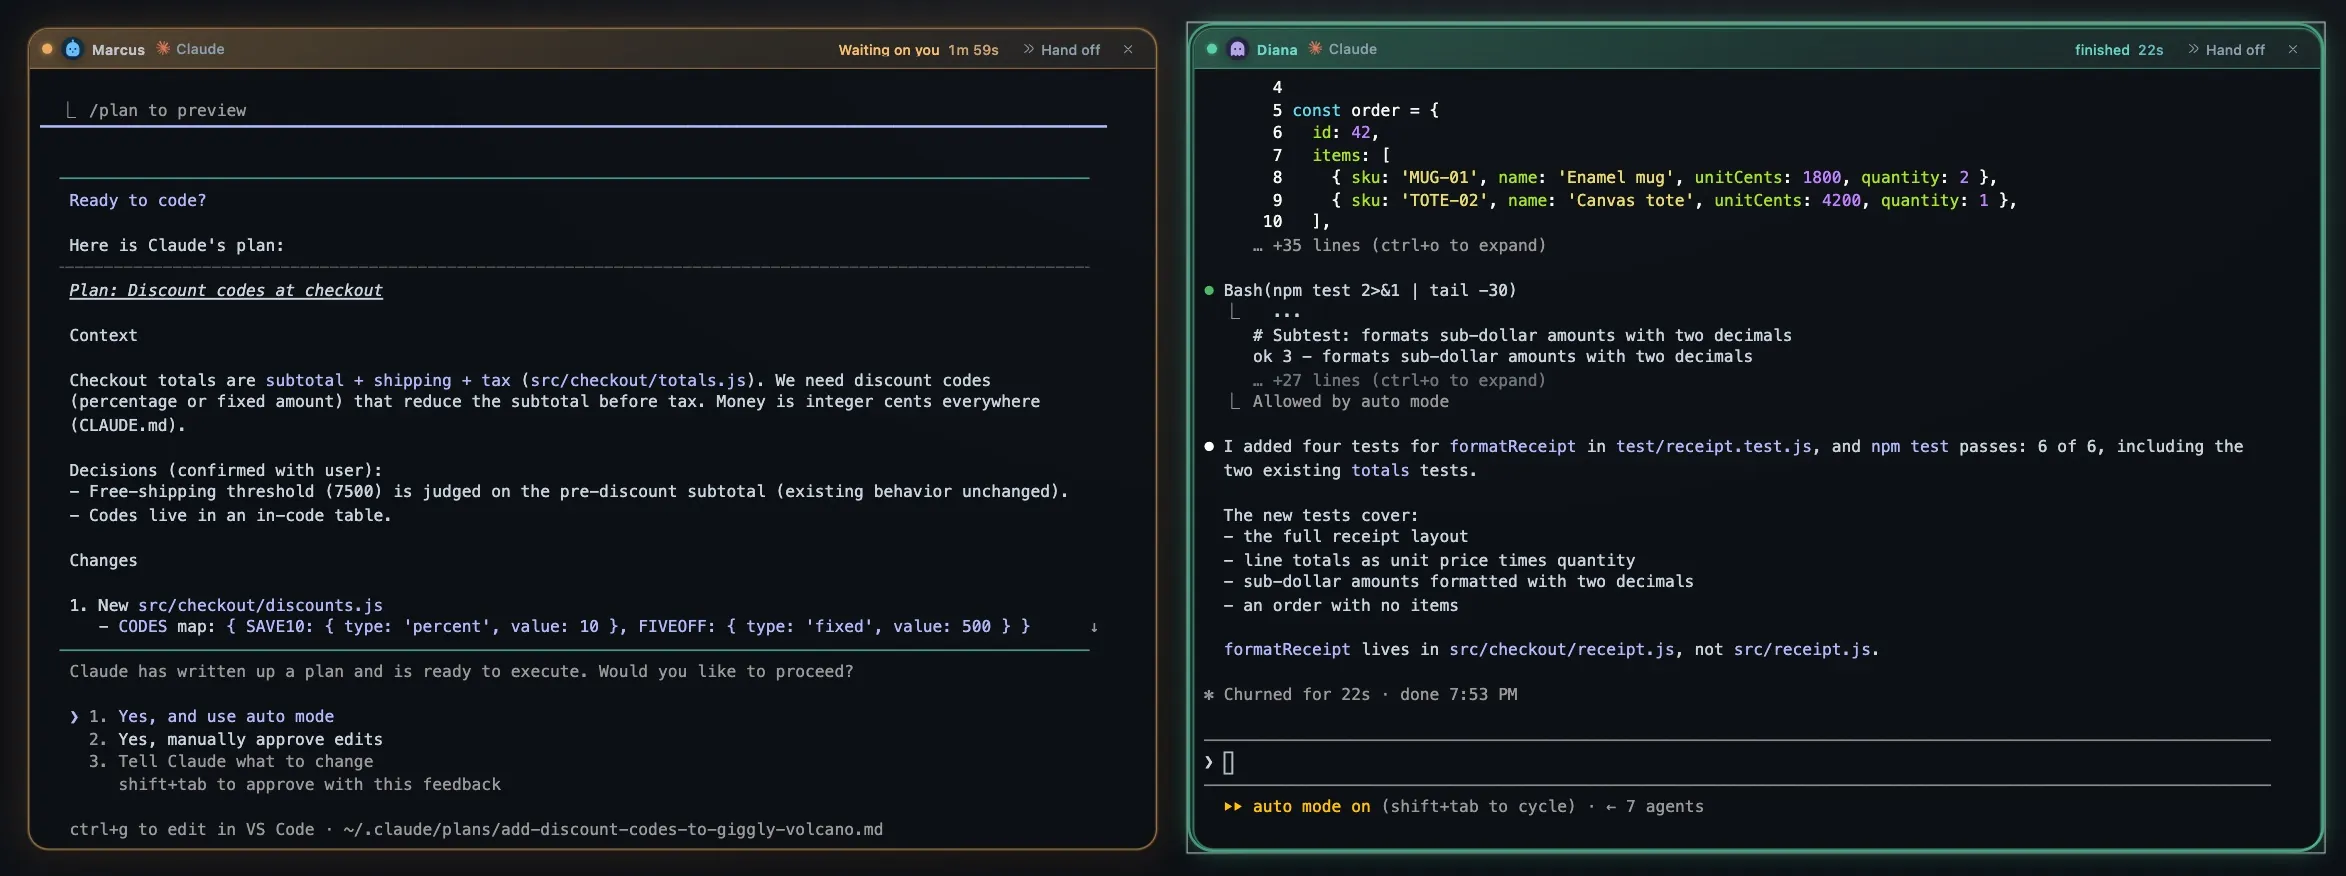
Two real Claude Code sessions on the same demo project. Marcus is waiting for a plan approval. Diana wrote tests and finished.
Tap Space and every window turns over. The back shows the agent's own title for the conversation, its state, and what it is waiting for.
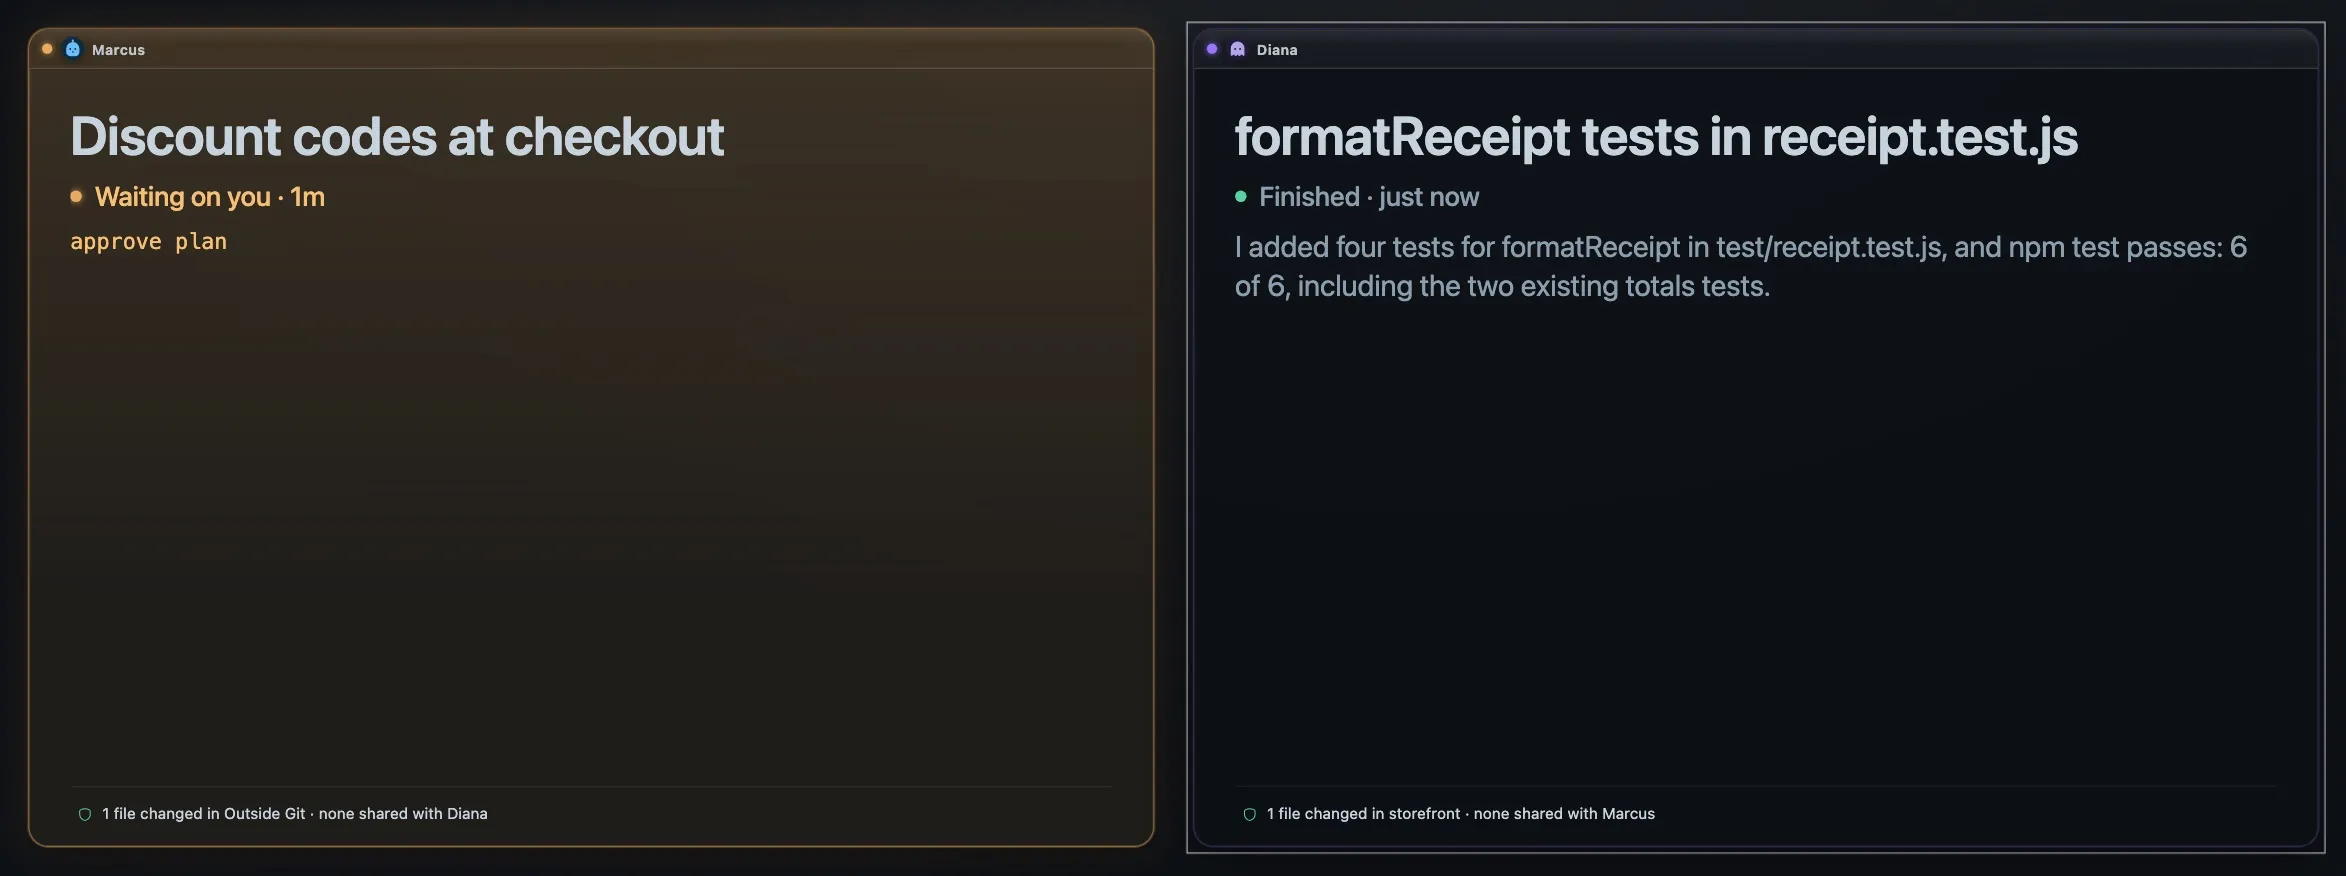
The same sessions after a tap of Space.
There is a limit I found while taking these screenshots. The questions Claude asked before it wrote the plan did not turn the window amber. Only the approval did. For those, and for alerts outside the app, Claude Code notification hooks still work inside a Starkomand window, because the agent is the real CLI.
Once a plan is approved, you do not have to build it in the same window. Handing a task from Claude Code to Codex covers the Hand off button in the window header, and a second agent reviewing the result covers the check afterwards.
The Starkomand features in this walkthrough
- Turn every window over to see where each agent stands.
- Hand work from one agent to another with a brief.
- Claude Code, Codex and other CLI agents with your own sign-ins.
More walkthroughs: Claude Code notifications on a Mac, the best terminal for Claude Code, and running Claude Code and Codex side by side.
To see your own agents' plans on one canvas, start the 3-day trial of Starkomand. It includes every feature, and your agents keep using the subscriptions you already have.